Hive分区表和分桶表
浅小兮分区表
-
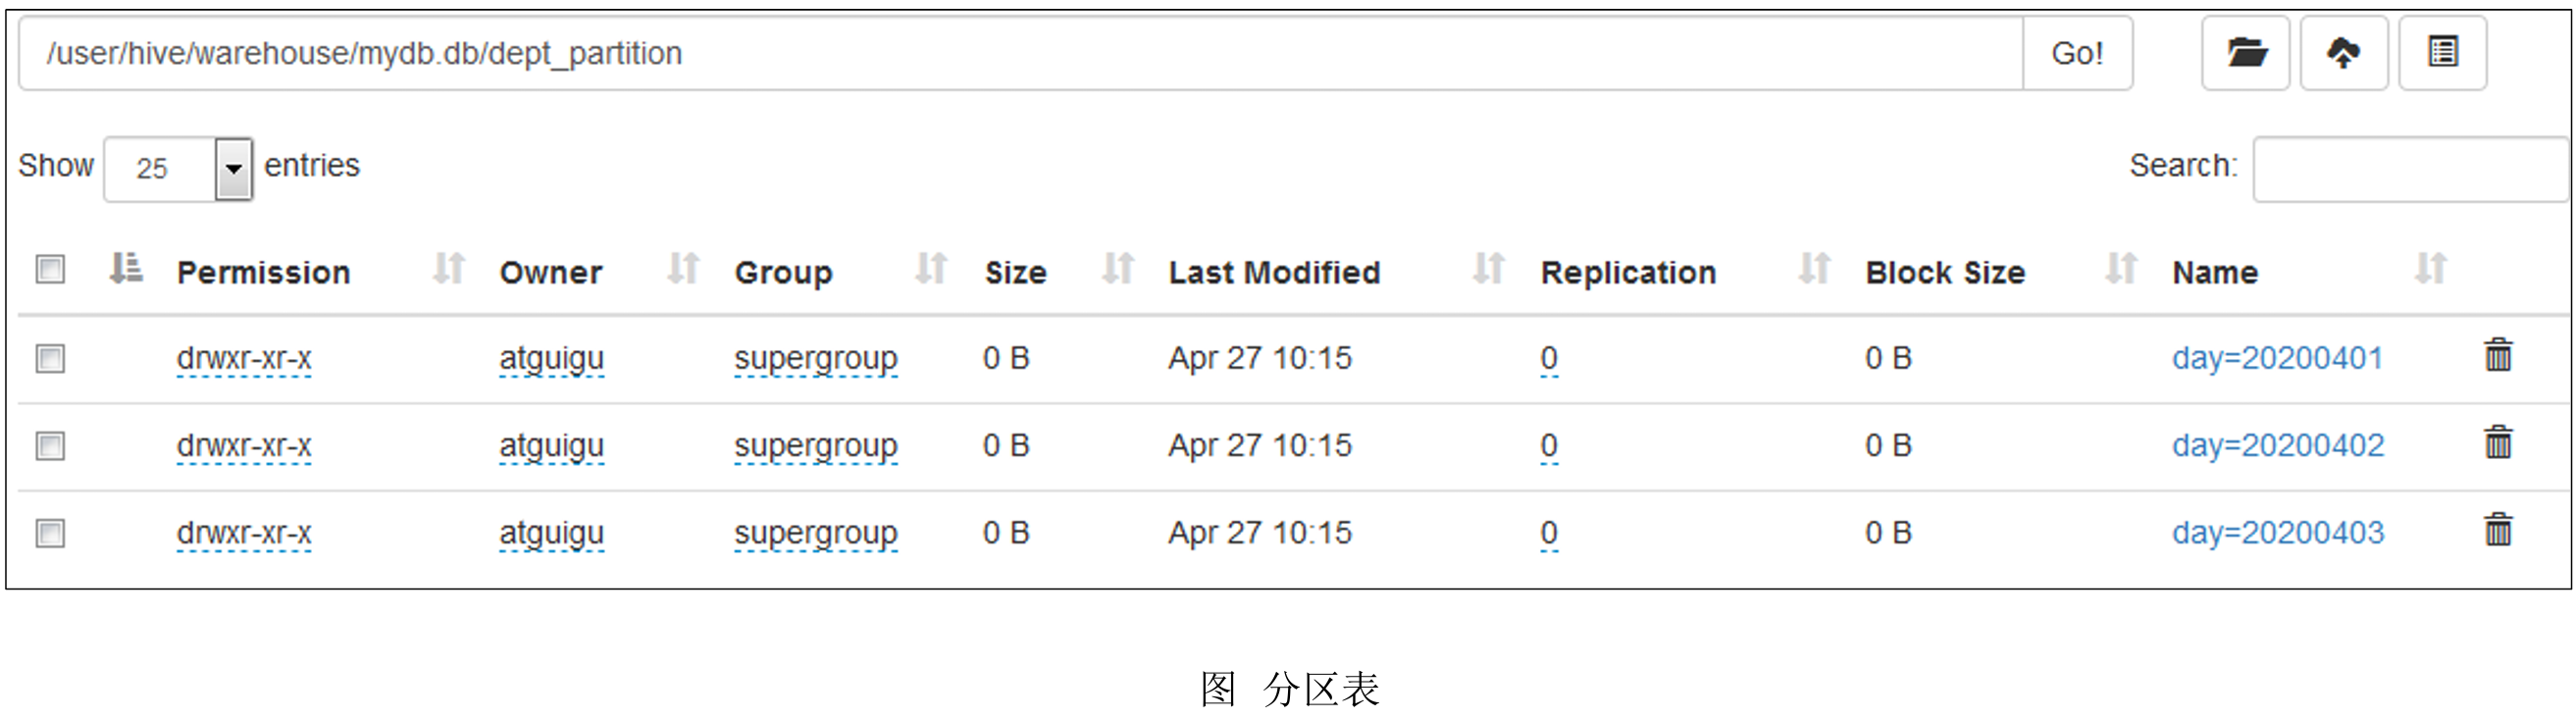
分区表实际上就是对应一个HDFS文件系统上的独立的文件夹。
-
该文件夹下是该分区所有的数据文件。
-
Hive中的分区就是分目录,把一个大的数据集根据业务需要分割成小的数据集。
-
在查询时通过WHERE子句中的表达式选择查询所需要的指定的分区,这样的查询效率会提高很多。
分区表基本操作
-
需要根据日期对日志进行管理,通过部门信息模拟
-
创建分区表语法
1 | hive (default)> |
注意:分区字段不能是表中已经存在的数据,可以将分区字段看作表的伪列。
-
数据准备
为每个分区准备数据,我们根据日期对日志进行管理,通过部门信息模拟
1 | [root@hadoop datas]$ vim dept_20200401.log |
-
案例实操
- 向dept_partition表的分区加载数据
1 | hive (default)> load data local inpath '/opt/module/hive/datas/dept_20200401.log' into table |
注意:分区表加载数据时,必须指定分区
2. 查询分区表中数据
- 单分区查询
1 | hive (default)> select * from dept_partition where day='20200401'; |
- 多分区联合查询(union 必走mr 效率较低)
1 | hive (default)> select * from dept_partition where day='20200401' |
-
增加分区
- 添加单个分区
1 | hive (default)> alter table dept_partition add partition(day='20200404') ; |
2. 同时添加多个分区
1 | hive (default)> alter table dept_partition add partition(day='20200405') |
-
删除分区
- 删除单个分区
1 | hive (default)> alter table dept_partition drop partition (day='20200406'); |
2. 同时删除多个分区
1 | hive (default)> alter table dept_partition drop partition (day='20200404'), |
-
产看分区表结构
1 | hive (default)> desc formatted dept_partition; |
二级分区
-
创建二级分区表
1 | hive (default)> |
-
加载数据
- 加载数据到二级分区表中
1 | hive (default)> load data local inpath '/opt/module/hive/datas/dept_20200401.log' into table |
2. 查询分区数据
1 | hive (default)> select * from dept_partition2 where day='20200401' and hour='11'; |
-
让分区表和数据产生关联的三种方式
- 方式一:上传数据后修复
- 上传数据
1 | hive (default)> dfs -mkdir -p /user/hive/warehouse/dept_partition2/day=20200401/hour=12; |
- 查询数据(查询不到刚刚上传的数据)
1 | hive (default)> select * from dept_partition2 where day='20200401' and hour='12'; |
- 执行修复命令
1 | hive (default)> msck repair table dept_partition2; |
- 再次查询数据
1 | hive (default)> select * from dept_partition2 where day='20200401' and hour='12'; |
2. 方式二:上传数据后添加分区
- 上传数据
1 | hive (default)> dfs -mkdir -p /user/hive/warehouse/dept_partition2/day=20200401/hour=13; |
- 执行添加分区
1 | hive (default)> alter table dept_partition2 add partition(day='20200401',hour='13'); |
- 查询数据
1 | hive (default)> select * from dept_partition2 where day='20200401' and hour='14'; |
3. 方式三:创建文件夹后load数据到分区
- 创建目录
1 | hive (default)> dfs -mkdir -p /user/hive/warehouse/mydb.db/dept_partition2/day=20200401/hour=14; |
- 上传数据
1 | hive (default)> load data local inpath '/opt/module/hive/datas/dept_20200401.log' into table |
- 查询数据
1 | hive (default)> select * from dept_partition2 where day='20200401' and hour='14'; |
动态分区
引言:关系型数据库中,对分区表Insert数据时候,数据库自动会根据分区字段的值,将数据插入到相应的分区中, Hive中也提供了类似的机制,即动态分区(Dynamic Partition),只不过,使用Hive的动态分区,需要进 行相应的配置。
-
开启动态分区参数设置
开启动态分区功能(默认true,开启)
1 | hive (default)> set hive.exec.dynamic.partition=true; |
设置为非严格模式(动态分区的模式,默认strict,表示必须指定至少一个分区为静态分区,nonstrict模式表示允 许所有的分区字段都可以使用动态分区。)
1 | hive (default)> set hive.exec.dynamic.partition.mode=nonstrict |
在所有执行MR的节点上,最大一共可以创建多少个动态分区。默认1000
1 | hive (default)> set hive.exec.max.dynamic.partitions=1000; |
在每个执行MR的节点上,最大可以创建多少个动态分区。
1 | hive (default)> set hive.exec.max.dynamic.partitions.pernode=100; |
整个MR Job中,最大可以创建多少个HDFS文件。默认100000
1 | hive (default)> set hive.exec.max.created.files=100000; |
当有空分区生成时,是否抛出异常。一般不需要设置。默认false
1 | hive (default)> set hive.error.on.empty.partition=false; |
-
案例实操
需求:将dept表中的数据按照地区(loc字段),插入到目标表dept_partition_loc的相应分区中。
1. 创建部门地区分区表dept_partition_loc
1 | hive (default)> |
2. 以动态分区的方式向dept_partition_loc表中插入数据
1 | hive (default)> insert into table dept_partition_loc partition(loc) select deptno, dname, loc |
3. 查看目标分区表的分区情况
1 | hive (default)> show partitions dept_partition; |
分桶表
引言:
-
分区提供一个隔离数据和优化查询的便利方式。
-
不过,并非所有的数据集都可形成合理的分区。
分桶表:
-
对于一张表或者分区,Hive 可以进一步组织成桶,也就是更为细粒度的数据范围划分。
-
分桶是将数据集分解成更容易管理的若干部分的另一个技术。
-
分区针对的是数据的存储路径(细分文件夹);分桶针对的是数据文件(按规则多文件放一起)。
案例实操:
-
创建分桶表
1 | Hive (default)> create table stu_bucket(id int, name string) |
-
查看表结构
1 | hive (default)> desc formatted stu_bucket; |
-
导入数据
导入数据到分桶表中,load 的方式将HDFS 上的数据导入到分桶表中(注意hive 版本,新版本中load 数 据可以直接跑MR但是也会有点问题,老版本的Hive需要将数据传到一张表中,然后采用查询的方式导入到分桶 表中)
1 | // 数据仍然使用student.txt |
-
查看创建的分桶表中是否分成4个桶

-
查询分桶的数据
1 | hive(default)> select * from stu_bucket; |
-
分桶规则:
-
Hive 的分桶采用对分桶字段的值进行哈希,
-
然后除以桶的个数求余的方 式决定该条记录存放在哪个桶当中
-
分桶表操作需要注意的事项:
-
mapreduce.job.reduces=-1,让 Job 自行决定需要用多少个 reduce 或者将reduce 的个数设置为大于 等于分桶表的桶数
-
从hdfs中load数据到分桶表中,避免本地文件找不到问题(跑MR任务)
-
insert 方式将数据导入分桶表
1 | hive(default)> truncate table stu_bucket;(删除表内数据,不删表结构,因此只能删内表) |